Much like its predecessors, Mortal Kombat 11 is all about demolishing your opponent in the most ludicrously gory manner possible. Rib-splitting kicks are great and all, but if you really want to push the boat out then it’s Fatalities that you’ll want to learn. These ridiculous finishers let you take a literal chunk (and usually even more) out of your opposition as you end them in a special cutscene. To perform a Fatality, you’ll need to know a specific series of inputs that are tied to the character you’re playing. It’s a bit of a pain to remember them, so in this article we’ll teach you all Fatalities in Mortal Kombat 11 and how to perform them.
*Warning: This article contains highly NSFW, graphic imagery*
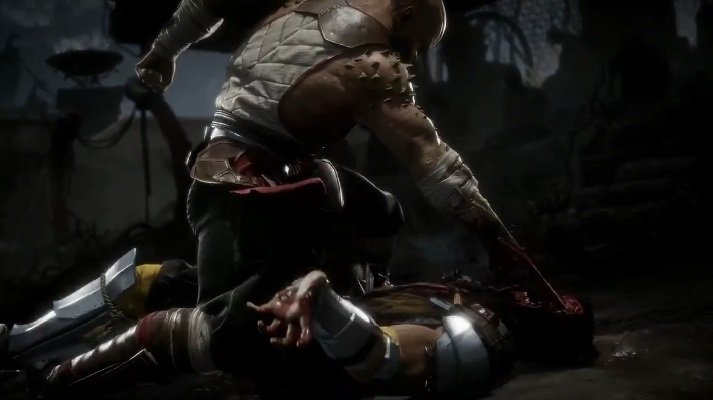
All Fatalities in Mortal Kombat 11

Each character has two Fatalities in Mortal Kombat 11, and while the input for the first one is immediately available in the menu, the second input can only be found by unlocking it from the Krypt. The key here, however, is that you can still perform the second fatality if you know the input, regardless of whether you’ve unlocked it in the Krypt or not. Thankfully we already know all of the inputs, so to save you some time, just check the list below for all the Fatality inputs in Mortal Kombat 11.
To help you follow the instructions below, here are the basic controls for all of MK11’s moves.
Move |
PS4 Controls |
Xbox Controls |
Switch Controls |
|
Front Punch |
Square |
X |
Y |
|
Back Punch |
Triangle |
Y |
X |
|
Front Kick |
X |
A |
B |
|
Back Kick |
Circle |
B |
A |
|
Throw |
L1 |
LB |
L1 |
|
Block |
R1 |
RB |
R1 |
Baraka Fatalities
Food for Thought (Close-Range)
Back, Down, Back, Back Punch
Rock, Paper, Baraka (Close-Range)
Back, Forward, Back, Front Kick
Cassie Cage Fatalities

I <3 u="" medium="" range="" b="">
Down, Down, Forward, Back Kick
#GirlPower (Medium range)
Back, Down, Down, Back, Back Punch
Cetrion Fatalities

Maintaining Balance (Medium range)
Back, Down, Forward, Down, Back Kick
Good and Evil (Medium range)
Back, Down, Back, Front Kick
D’Vorah Fatalities

New Species (Close range)
Back, Forward, Back, Front Kick
Can’t Die (Medium range)
Back, Down, Down, Back Kick
Erron Black Fatalities

Melted (Close range)
Down, Down, Down, Front Punch
Death Trap (Medium range)
Down, Forward, Down, Back Punch
Frost Fatalities

Ice Sculpture (Close range)
Forward, Back, Down, Front Punch
The Cyber Initiative (Medium range)
Back, Forward, Down, Forward, Back Kick
Geras Fatalities

Phasing Through Time (Medium range)
Back, Down, Down, Front Kick
Peeling Back (Close range)
Down, Forward, Back, Front Punch
Jacqui Briggs Fatalities

Spider Mines (Close range)
Forward, Back, Forward, Front Kick
Nothin’ But Neck (Medium range)
Back, Forward, Back, Back Kick
Jade Fatalities

Pole Dance (Close range)
Down, Down, Down, Front Punch
Bow Before Me (Medium range)
Down, Down, Forward, Down, Back Kick
Jax Briggs Fatalities

Coming In Hot (Close range)
Forward, Down, Forward, Front Kick
Still Got It (Close range)
Back, Forward, Back, Down, Front Punch
Johnny Cage Fatalities

Mr. Cage’s Neighborhood (Close range)
Forward, Back, Down, Down, Back Kick
Who Hired This Guy (Close range)
Forward, Down, Forward, Front Punch
Kabal Fatalities

Road Rage (Medium range)
Forward, Back, Down, Forward, Front Kick
Hooked (Close range)
Down, Down, Down, Back Kick
Kano Fatalities

Last Dance (Close range)
Forward, Down, Down, Front Punch
Face Like A Dropped Pie (Close range)
Back, Down, Forward, Back Punch
Kitana Fatalities

Gore-Nado (Medium range)
Down, Down, Down, Down, Back Punch
Royal Execution (Medium range)
Down, Back, Forward, Front Punch
The Kollector Fatalities

For The Kollection (Close range)
Down, Down, Down, Down, Back Kick
Head Lantern (Close range)
Down, Forward, Back, Front Punch
Kotal Kahn Fatalities

Totem Sacrifice (Close range)
Back, Down, Back, Front Kick
Kat Food (Close range)
Back, Forward, Back, Forward, Front Punch
Kung Lao Fatalities

Headed Nowhere (Close range)
Down, Forward, Back, Down, Back Punch
Meat Slicer (Close range)
Down, Forward, Down, Front Kick
Liu Kang Fatalities

Burn Out (Close range)
Down, Back, Down, Forward, Front Punch
Belly of the Beast (Medium range)
Back, Down, Back, Forward, Back Punch
Noob Saibot Fatalities

Split Decision (Medium range)
Back, Forward, Back, Forward, Back Kick
Double Trouble (Close range)
Down, Down, Down, Front Punch
Raiden Fatalities

Alternating Kurrent (Medium range)
Back, Down, Back, Front Punch
Direct Current (Close range)
Down, Forward, Back, Front Kick
Scorpion Fatalities

You’re Next (Long range)
Back, Down, Down, Front Punch
Chain Reaction (Medium range)
Down, Forward, Back, Back Punch
Shao Khan Fatalities
Back Blown Out
Back, Forward, Down, Down, Back Punch
Kahn-Sequences
Back, Forward, Back, Front Punch
Skarlet Fatalities

Bloody Mess (Medium range)
Forward, Back, Down, Front Kick
Heart Kondition (Medium range)
Down, Down, Forward, Back Kick
Sonya Blade Fatalities

To The Choppa (Medium range)
Down, Forward, Back, Back Punch
Supply Drop (Close range)
Back, Forward, Down, Front Kick
Sub-Zero Fatalities

Ice-Cutioner (Medium range)
Forward, Back, Forward, Back Punch
Frozen In Time (Medium range)
Forward, Down, Forward, Back Kick
Thanks to our friends at Twin Galaxies for their images.
Want to see these Fatalities in action? Check out this video by PowerPyx
Those are all the Fatalities in Mortal Kombat 11 that we’ve discovered so far, but we’ll be updating this guide whenever DLC characters are added to the game. Looking for more MK 11 guides? Check out our hub for the game by clicking here!